
TestFlight Upload with Pixelmost: App Store Connect, Certificates, and Distribution
Published January 29, 2026 · Updated July 14, 2026
A practical guide to moving from an app idea in Pixelmost to TestFlight testing and on toward a public App Store release.
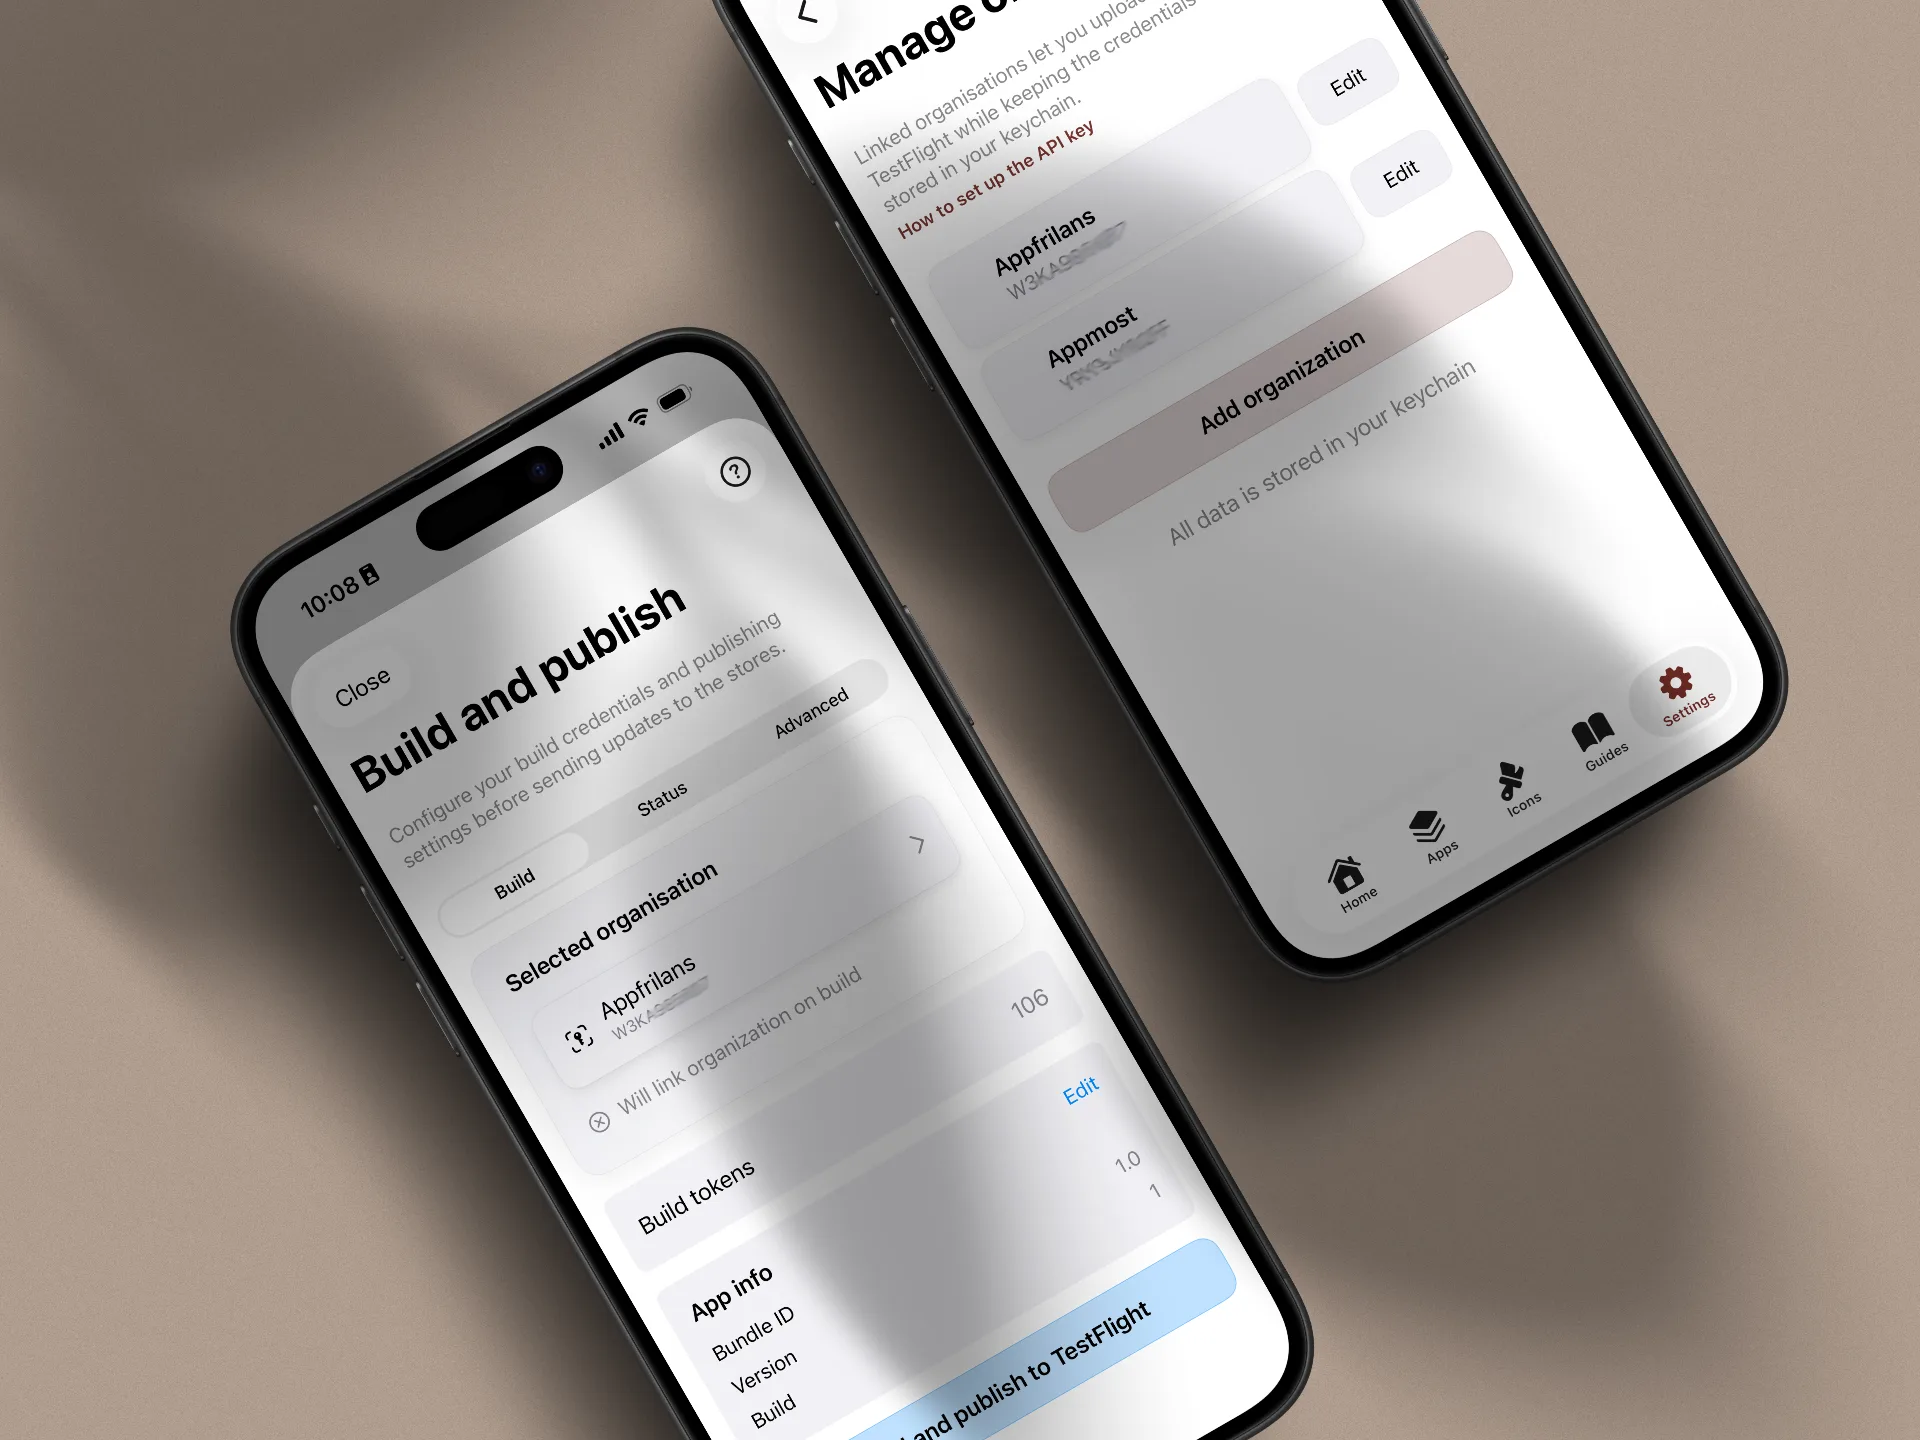
TestFlight is Apple's official channel for beta distribution of iOS, iPadOS, and macOS apps. If you want to test flows, collect feedback, and improve quality before release, TestFlight is the right path. With Pixelmost, you can move from app concept to working prototype and, on a plan with build tokens, upload builds to TestFlight. Start with the Pixelmost TestFlight upload overview if you want the shorter product summary.
Before you start the upload
The Pixelmost upload flow expects the Apple-side identity of the app to exist already. Prepare these items before you spend a build token:
- An active Apple Developer setup with access to the correct organisation
- An explicit App ID and Bundle ID for the app
- A matching app record in App Store Connect
- Credentials linked to the correct organisation in Pixelmost
- A reviewed version number and a new build number for the upload
An eligible Pixelmost plan with build tokens is required for this workflow. Check the current Pixelmost plans before you begin.
How TestFlight fits into the Pixelmost workflow
In Pixelmost, you work with app structure, screens, components, and prototype flow. When you are ready for testing, you export and upload a build to App Store Connect and TestFlight. The AI Max plan includes 5 TestFlight upload tokens to help you start testing on real devices.
Upload from the Pixelmost editor
- Open Share in the editor and choose Upload prototype.
- Select the Apple organisation connected to the target app.
- Review the App Store Connect app, Bundle ID, version, and build number.
- Choose Build and publish to TestFlight and confirm app-to-organisation linking if requested.
- Wait for the build upload and Apple's processing stage to finish.
- Open the processed build in TestFlight and add the intended testers.
If the upload does not start, check access and identity first. If the upload succeeds but the build is missing, check App Store Connect processing and confirm that you selected the expected app and version.
What needs to be ready in App Store Connect
Before your first upload, you need to configure the core metadata in App Store Connect:
- App name, language, and primary category
- A Bundle ID that exactly matches your app
- Team members, roles, and permissions for developers and testers
- A version and build strategy for repeated uploads
Certificates, signing, and provisioning profiles
For Apple to accept a build, code signing needs to be correct. Three pieces must line up: the certificate, the bundle identifier, and the provisioning profile.
- Certificate: proves who signed the app
- Bundle ID: the unique ID that defines the app in Apple's ecosystem
- Provisioning profile: connects the app ID, certificate, and entitlements
If any part does not match, you will usually see errors such as signing mismatch, invalid profile, or rejected upload. Make sure early that your Apple team settings and your app's bundle identifier stay consistent throughout the full chain.
Internal vs. external TestFlight distribution
The difference between internal and external distribution affects how quickly you can test and how many users you can reach.
- Internal distribution: for members of your App Store Connect team. This is the fastest route to testing because the build can usually be distributed as soon as processing is complete.
- External distribution: for customers, partners, or broader test groups via email or public links. This usually requires Beta App Review before the first external rollout.
A practical approach is to start internally for fast QA, then move to external testing once onboarding, payments, and core journeys are stable.
From TestFlight to a public App Store release
Once beta feedback has been handled, you move toward public distribution in the App Store. That usually adds steps such as:
- Final app metadata, screenshots, and localized copy
- Privacy nutrition labels and any export compliance answers
- Review information for Apple's review team
- A release plan: manual release or automatic release on approval
Keep versions and builds predictable
Treat the marketing version and build number as two different controls. Keep the version stable while testing a release candidate, and increment the build number for every new upload. Record which build each tester group received so feedback can be connected to the right binary. Before a later upload, verify the selected organisation, Bundle ID, version, and build again instead of assuming the previous values still apply.
Common TestFlight upload errors and how to avoid them
- “Invalid Binary”: check signing, capabilities, and app metadata
- The build does not appear in TestFlight: wait for processing and confirm that the correct app and version were selected
- Testers do not receive invites: verify email addresses, groups, and tester status in App Store Connect
- Version chaos: keep a clear build number strategy for every upload
Summary
TestFlight is the bridge between concept and production. Pixelmost gives you a faster path from app design to a testable build, and with the right App Store Connect setup, certificates, and distribution strategy, the process becomes both faster and safer.